Temporary Files Deletion in Windows 11 2022h2
A Major Improvement
The OneDrive Conundrum (more about
this coming soon) that befuddled me after installing
Windows 11 2022h2 made me look further into exactly how much disk space
was available on my puny 256gb SSD. Only 7gb was available.
I found a backup of a very old drive on my C: drive that was about 40gb
in size. Since I did a full backup of the Documents Folder, I
decided to delete that folder from the root drive. I also decided
to delete all my Temporary Files. And my journey
of discovery began.
Since ever since I can remember — until
Windows 11 2022h2 — the controls and menus to delete Temp Files and
perform disk drive cleanup always looked like below.
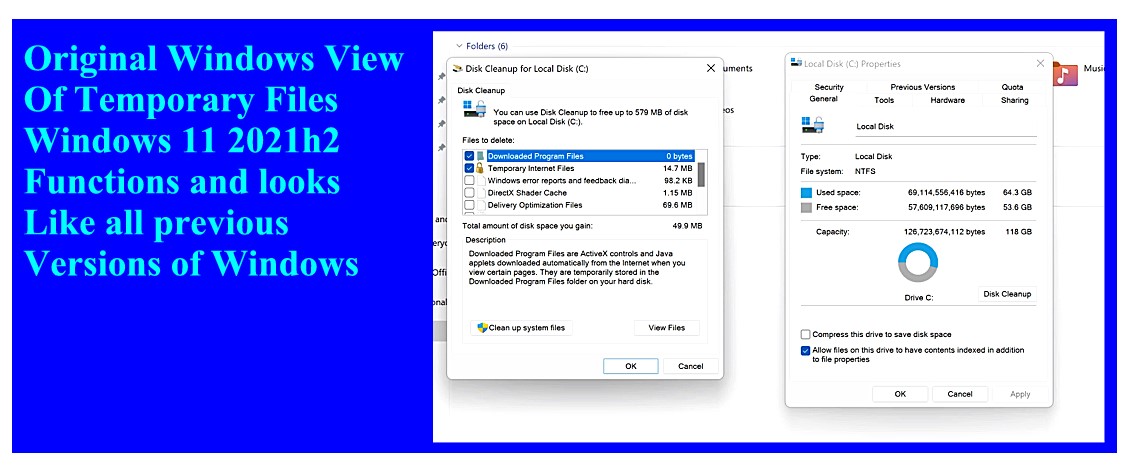
To access Disk Cleanup in Windows 11 2022h2, the basic click sequence is
the same as always.
1. Right Click Local Disk (C:)
2. From the
Context Menu, click Properties

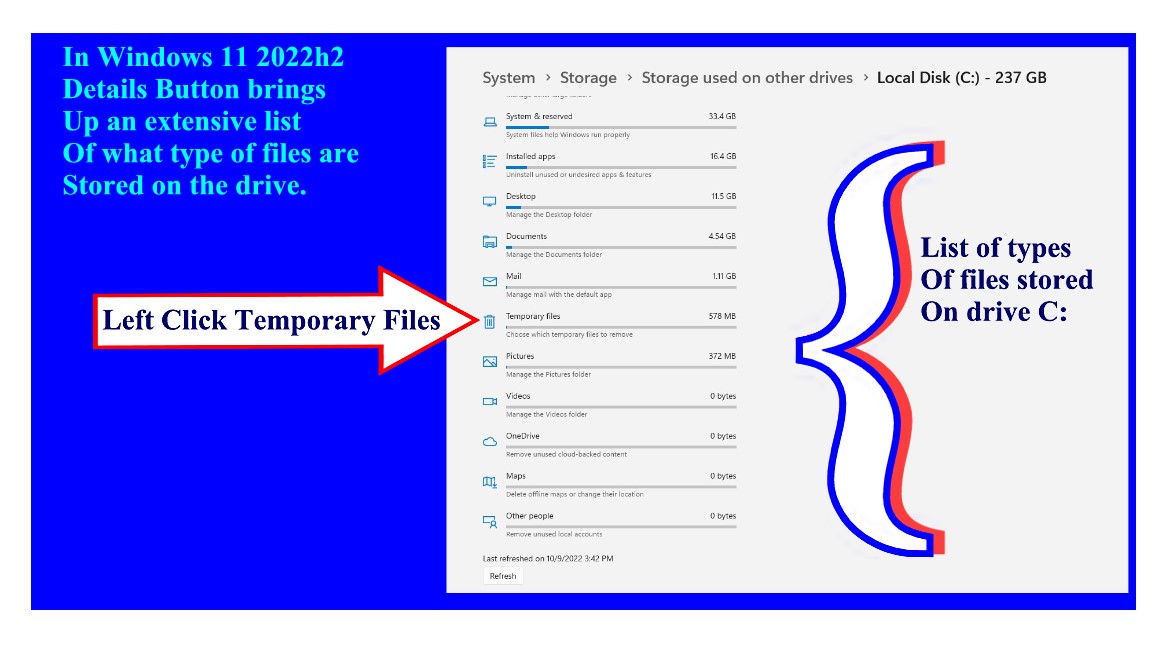
What opens in Windows 11 2022h2 is an extensive menu of the file types
located on the root drive.
To access the Temporary Files to delete,
click Temporary files.
When you click Temporary Files, a menu listing in detail the different types of Temporary Files stored on the root drive and how much space each file type takes up. Click the Remove Files button to delete the selected files.

When you delete Temp files in Win 11 2022h2, the screen will dim while the deletion is in process.
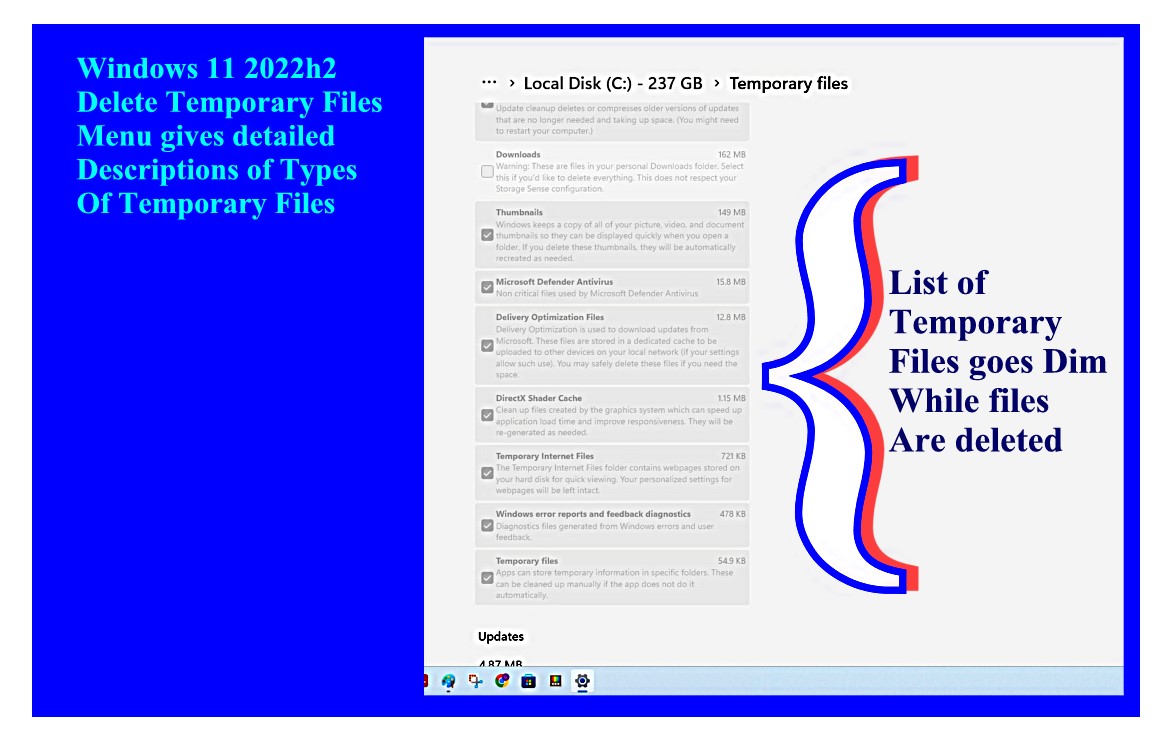
It may take more than one pass to delete all the Tamp Files.

Going into the exercise outlined above, I started out with 7gb of storage available on my root drive after installing Windows 11 2022h2. Afterward, I regained much disk space. Moved the duplicate folder to a backup drive. Cleaned out all Temp Files. Now I have 57gb of storage space available. A exercise that was definitely worthwhile.
Measure Twice Cut Once
— Second
Frutes, John Florio, (1591)